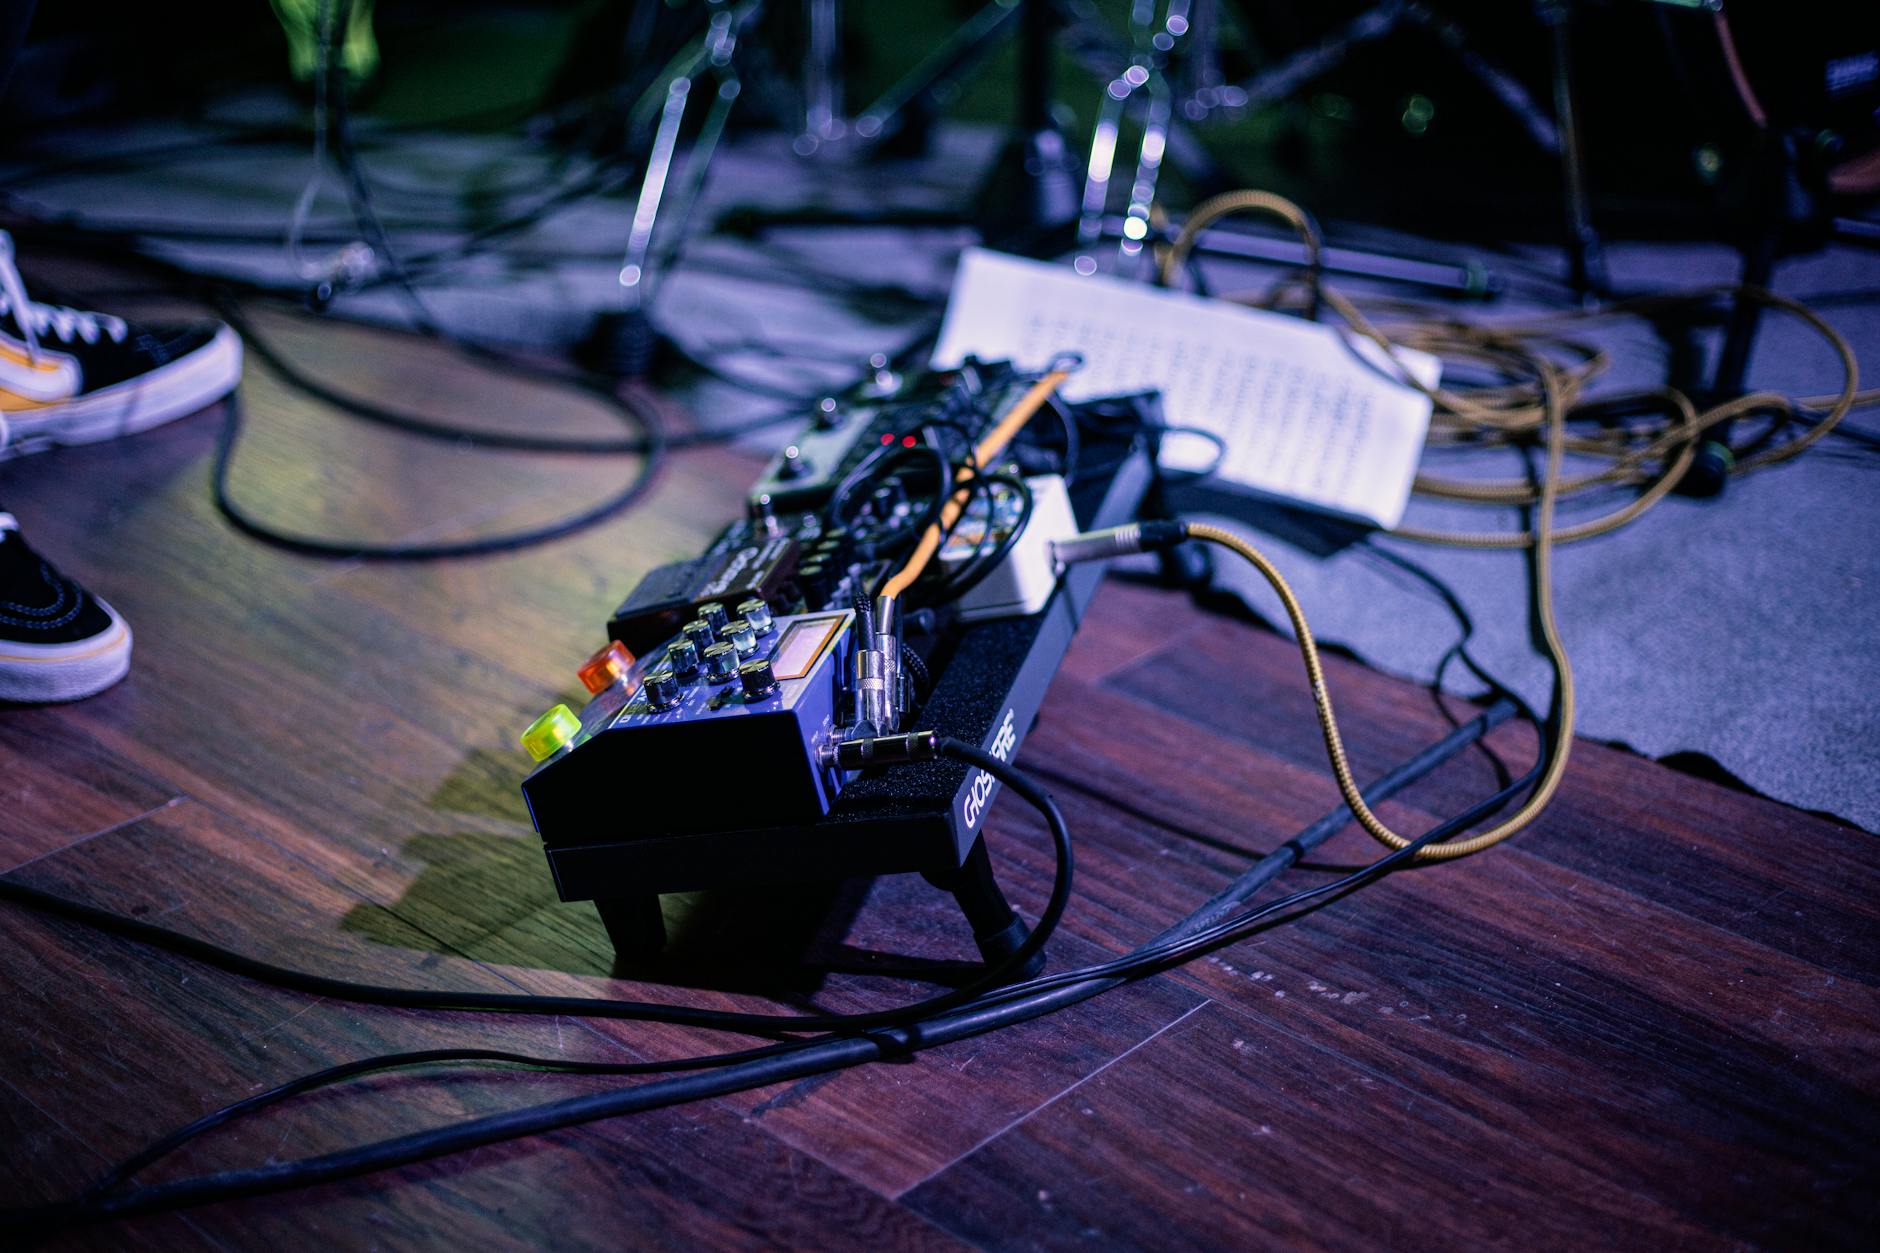
5 Budget Pedalboard Hacks That Instantly Improve Your Tone
Unlock pro guitar tone with these 5 budget pedalboard hacks. Improve your sound fast—no big spending. Discover expert tweaks for instant results!

Most budget pedalboards are packed with potential but miss out on pro-level tone. It's not about buying the latest pedal. The trick is in smart tweaks—changes that cost almost nothing but deliver a night-and-day difference in sound. Plenty of players spend hours swapping pedals but overlook simple, affordable hacks hiding right on their boards. Turns out, better tone is just a few fixes away.
Here’s how anyone can improve guitar tone on a budget: five creative pedalboard hacks, backed by real experts, that deliver instant results without breaking the bank.
What You'll Learn:
- How to reorder pedals for maximum clarity and punch
- Where to place buffers and why it matters for cheap boards
- Affordable, clean power supply tricks to kill pedal buzz
- Quick cable and patch upgrades that tighten up any rig
- Mounting and layout tips for a reliable, noise-free signal
1. Optimize Your Pedalboard Signal Chain for Maximum Tone
The right pedal order can turn a muddy, lifeless board into a punchy, clear machine. This hack costs nothing but can instantly improve guitar tone on a budget. The magic? Arranging pedals so every effect works with—not against—your sound.
Why Pedal Order Matters More Than You Think
Classic pedal order usually goes: tuner, wah, drive, modulation, time. But it’s not always best for every style. Pushing a chorus into a drive pedal thickens leads, while reverb before distortion creates wild, ambient tones.
Here’s where small changes make a big difference:
- Put compression after overdrive for smoother sustain
- Try fuzz after phaser for synth-like swirl
- Flip modulation before drive to soften harsh edges
- Place delay at the end for echo that remains clear
Even low-cost boards come alive with a little experimentation. Some legendary tones come from ‘wrong’ pedal orders.
Buffer Placement: The Secret to Preserving High-End
Cable runs, especially on budget boards, can eat high frequencies alive. That’s where buffers step in. According to GuitarIQ and Guitar World, a buffer at the start or end keeps tone crisp, even with cheap patch cables.
For boards with over six pedals or long cable runs, try this:
- Buffer first: preserves high-end before any tone sap occurs
- Buffer last: restores lost clarity on return to amp
- Avoid stacking too many buffers—one or two is plenty
The result: less mud, more sparkle, even on budget signal chains.
True-Bypass vs. Buffered Pedals: What’s Best for Cheap Setups?
True-bypass pedals keep your signal pure—but only if cable runs are short. Budget setups with lots of true-bypass effects risk ‘tone suck’—dull, lifeless highs. Buffered pedals add a small buffer circuit, preventing this problem. If most pedals are true-bypass, add a buffer or buffered pedal.
Pro tip: Use a cheap loop switcher to remove problem pedals from your chain altogether. It’s the fastest upgrade most players are missing. Buffers, placement, and creative pedal order deliver real budget pedalboard hacks without buying a thing.
Next up: Power supply fixes that quiet the noise for good.
2. Power Up: Clean, Isolated Power Supplies on a Budget
Noisy pedals? It’s usually a power problem. Shared power adds buzz and hum—especially with cheap wall warts or crowded daisy chains. The right power setup is one of the simplest budget pedalboard hacks for instant tone improvement.
The Real Impact of Power on Pedalboard Tone
Josh Scott of JHS Pedals says it best: clean, isolated power is the difference between pro and amateur boards. Shared adapters introduce noise, bleed, and tone inconsistencies. Isolated outputs ensure every pedal gets fresh, interference-free power. MusicRadar and Guitar World both highlight clean power as the number one overlooked fix for budget boards.
- Shared power: more buzz, less reliability
- Isolated power: less noise, better sound
- Dirty mains: uneven pedal response, volume dips
Affordable Isolated Power Options and DIY Solutions
Isolated power doesn’t have to mean pricey bricks. Many budget models (Caline, Donner, Joyo) offer true isolation for each output. For tighter budgets, create ‘power islands’ using adapters to split power and limit crosstalk.
Try these options:
- Entry-level isolated supplies: under $40 for four to eight pedals
- Daisy chain with splitters: power high-draw pedals separately to cut hum
- Use battery packs for digital pedals most prone to noise
DIY solutions abound. Many players mod cheap surge strips, or run a mix of battery and adapter power for short sets.
Troubleshooting Power Issues: Quick Fixes for Buzz and Hum
The fastest way to check power issues? Unplug all but one pedal and add them back, one by one. If buzz returns, that pedal’s power source—or the daisy chain itself—may be to blame.
Follow this quick checklist:
- Use only shielded DC cables to reduce noise
- Keep digital and analog effects on separate power lines
- Ground everything: no exceptions
- If problems persist, try the amp’s clean channel with all effects off to isolate pedalboard issues
With clean, isolated power—even on a tight budget—most pedalboards get quieter, clearer, and gig-ready. Next up: cables and patch management that make even cheap boards sound pro.
3. Cable Quality and Patch Management: Small Changes, Big Results
No board is stronger than its weakest patch cable. Cheap cables eat tone, add hum, and introduce headaches out of nowhere. The good news? Upgrading and organizing patch cables is an easy win for anyone wanting to improve guitar tone on a budget.
Why Cable Quality Matters (Even on a Budget)
Patch cables often get ignored—until signal loss or noise becomes a problem. Shielded cables protect against hum and interference, making a real difference even on small boards. As Guitar World and GuitarIQ confirm, a $10 shielded patch is usually better than a budget stompbox cable.
- Poor cables = loss of highs, extra hiss
- Quality shielded patch = clarity, reliability
- Cable strain = crackles, dropouts mid-song
Just swapping out cheap cables can restore lost brilliance and make effects more responsive—and there’s no need for gold-plating.
DIY Patch Cable Upgrades and Management Tips
Making your own patch cables is simple and saves money. All that’s needed: solderless kits, basic pliers, and five minutes per cord. Short runs prevent signal loss and reduce clutter. For layout:
- Keep cables as short as possible—under 12 inches when you can
- Route at right angles or neatly around board edges
- Label each cable for fast troubleshooting
DIYers often use color-coded cable jackets or tape for quick identification. It’s a lifesaver when speed counts.
Securing Connections: Preventing Cable Strain and Failures
No fancy case needed. 3M Dual-Lock and mounting tape secure pedals—and the cables underneath—better than basic Velcro. Andertons and GuitarIQ both highlight these simple fixes as game changers for reliability.
Here’s a quick checklist:
- Use 3M Dual-Lock or heavy-duty mounting tape under each pedal
- Bunch excess cable slack and tape it to the board
- Regularly check all connections before a gig or session
With cables managed, signals stay tight and noise-free. Next: DIY layout tricks that make every board more solid and reliable.
4. DIY Pedalboard Layout and Mounting Tricks for Reliable Tone
Getting pro-level performance from a pedalboard doesn’t require a boutique case. Surprisingly, repurposed materials and clever layout choices can turn budget boards rock-solid—and dead quiet. Reliable tone comes from what’s underneath as much as what’s on top.
Building a Budget Pedalboard: DIY Materials and Layout Ideas
Players have used everything from thin plastic storage lids to sturdy scrap wood for pedalboards. These options are dirt cheap and easy to customize. Andertons suggests even shallow toolboxes work perfectly—just add foam for cushioning.
- Plastic storage lids make lightweight, portable boards
- Wood planks offer solid, vibration-free mounting
- Recycled cases (like old briefcases) become stealthy gig rigs
- A shallow toolbox with power supply tucked underneath stays tidy
The right material depends on weight, size, and how much you travel.
Mounting Pedals Securely: Tape, Velcro, and Dual-Lock Compared
Velcro is the classic choice, but 3M Dual-Lock holds pedals in place much tighter—especially on rough stages. Mounting tape is a strong, affordable alternative. GuitarIQ says these upgrades prevent accidental disconnections and cable strain that cause sudden silence mid-performance.
- Velcro: easy to reposition but can come loose
- Dual-Lock: creates a near-permanent bond—hard to knock loose
- Mounting tape: strong, nearly invisible, and works in a pinch
Pro tip: Always test mounting strength by picking up the board upside down—a true reliability test.
Optimizing Layout for Access and Signal Flow
Lining up pedals by signal order saves troubleshooting headaches. Arrange pedals so the most-used effects are closest to the foot, and power cables don’t cross over signal paths. Visualizing the layout prevents overlap and crowding.
Layout checklist for maximum reliability:
- Signal flows left to right or right to left (keep it consistent)
- Leave finger room around footswitches (no accidental stomps)
- Keep power supply and cables under the board if possible
- Test every connection before locking the board down
The result: a board that’s easy to maintain, quick to set up, and dead reliable on stage. Next, pro-level tone tweaks that get more from your existing setup—without a dime spent on new pedals.
5. Pro-Level Tone Tweaks: Squeeze More from What You Have
Professional tone isn’t just a gear budget thing. Much of it comes from creative choices with what’s already on hand. These final pedalboard hacks squeeze every drop of tone from existing pedals—no new purchases required.
Creative Pedal Order Tweaks for Unexpected Results
The ‘rules’ are a starting point—not a mandate. Try placing your compressor after drive pedals for more controlled solos, or run a chorus in front of gain for vintage-style swirl. Many players use delay before distortion to mimic tape echo from old-school rigs.
- Compressor after drive: sustains notes for fluid solos
- Chorus before drive: thickens single-note lines
- Delay into dirt: dark, old-school slapback effects
- EQ pedal anywhere: sculpts tone surprises on the fly
Legendary artists often rely on unique pedal orders for signature sounds—why not experiment?
Using EQ and Modulation for Instant Tone Upgrades
A cheap EQ pedal can lift solos above a dense mix or tame boomy rigs at home. Place post-drive for max control, and try boosting mids between 700Hz and 1.2kHz for clarity. Subtle modulation—like chorus at low depth or a fast slapback delay—adds body and sparkle without mud.
- Bump mids on EQ for solos without boosting gain
- Chorus depth at 9 o’clock/thin for shimmer
- Delay set under 100ms for added punch
Simple adjustments frequently sound like a whole new rig.
Dialing In Amp EQ for Live and Practice Settings
Adrian Thorpe (Thorpy FX) recommends rolling off treble and upper mids when playing at gig volumes—especially with bright amps like a Fender Twin Reverb. What sounds rich at home can get piercing live.
Try this step-by-step:
- Set treble lower than usual (around 3-4 for Fender amps)
- Drop upper mids if leads feel harsh
- Bump bass slightly to fill the room without flub
Above all, always dial EQ in the actual environment—gig or practice. It’s the cheapest and fastest improvement you’ll hear all night. Combine with previous hacks for boutique-like results even from budget rigs.
Frequently Asked Questions
How can I improve my guitar tone without spending much?
Improving guitar tone on a budget starts with simple pedalboard hacks. Reorder pedals for maximum clarity, add a buffer to preserve high-end, use shielded patch cables, power everything with isolated supplies, and tweak amp EQ in context. Each of these steps costs little but delivers noticeable results fast.
What cheap mod can make a big difference on a pedalboard?
Adding a buffer pedal or buffered tuner—especially at the start or end of your chain—solves tone loss issues for under $30. Replacing basic Velcro with Dual-Lock or mounting tape also dramatically increases reliability and cuts out unwanted cable noise, making a budget board sound professional.
How do I optimize pedalboard signal chain on a budget?
Start by placing pedals in a classic order—tuner, drive, modulation, then time-based effects. Add a buffer at the beginning or end for clarity. Use shielded patch cables and, if possible, a loop switcher to remove unused pedals from the chain. Experimenting with order unlocks new tones instantly.
Can power supplies really affect my pedalboard tone?
Yes—dirty or shared power can introduce buzz, hum, and signal dropouts. Low-cost isolated power or 'power islands' fix these issues, resulting in cleaner, clearer tone without major expense. Experts like Josh Scott of JHS Pedals consider clean power a foundational budget pedalboard hack.
Is it better to buy new pedals or upgrade my existing board?
Upgrading your board with smart hacks—like reordering pedals, improving patch cables, securing mounts, and cleaning up power—often yields bigger tonal benefits than simply buying new pedals. Maximizing your current setup first always delivers better value for budget-conscious players.
Improving tone doesn’t mean draining your wallet. It comes down to five real fixes: smart pedal order, clean isolated power, better cables, reliable mounting and layout, plus creative tweaks with what you’ve already got. Each of these budget pedalboard hacks turn an ordinary board into a flexible, responsive, and gig-ready rig.
Start by tackling just one of these hacks—maybe reroute your pedal chain or swap in some shielded patch cables—and listen close. The difference is real. Next rehearsal or gig, you’ll notice a tighter, clearer, bolder sound.
The smartest players don’t just buy new pedals—they squeeze every bit of magic from the board they’ve built. Ready to hear what your setup can really do?
Key Takeaways
- Small, affordable tweaks often offer more tonal value than expensive gear upgrades.
- Signal chain, power, and cable management are foundational for pro-level results.
- DIY materials and mounting solutions bring studio reliability to any budget board.
- Creative use of existing pedals and amp EQ settings beats chasing the next shiny thing.
Related Topics
Explore more articles in these topics to deepen your knowledge.
Related Articles

Small‑Venue Guitar Live Sound Setup and Troubleshooting Guide for 2025
Master small venue guitar live sound setup with step-by-step troubleshooting. Boost tone, fix gig issues, and play confidently—get pro tips now!

The Science Behind Guitar String Vibration and Tone
Learn how guitar string vibration shapes tone and technique. Discover the physics, tips, and secrets for mastering your unique sound.

Two‑Rock Sensor 35‑Watt Combo Amp Review: John Mayer’s Boutique Tone Platform for 2025
Discover the Two‑Rock Sensor 35‑watt combo amp review, covering Mayer’s 2025 tone, key features, and expert insights. Read before you buy!
Discover more insights from our blog to enhance your musical journey.
